Are you looking to dive into the world of process simulation using IPSE GO? In this tutorial, we will guide you through the basics of setting up a project and creating a Steam Cycle. Each step is broken down for clarity, and we've included visuals to help you along the way. Let's get started!
1. Create Project
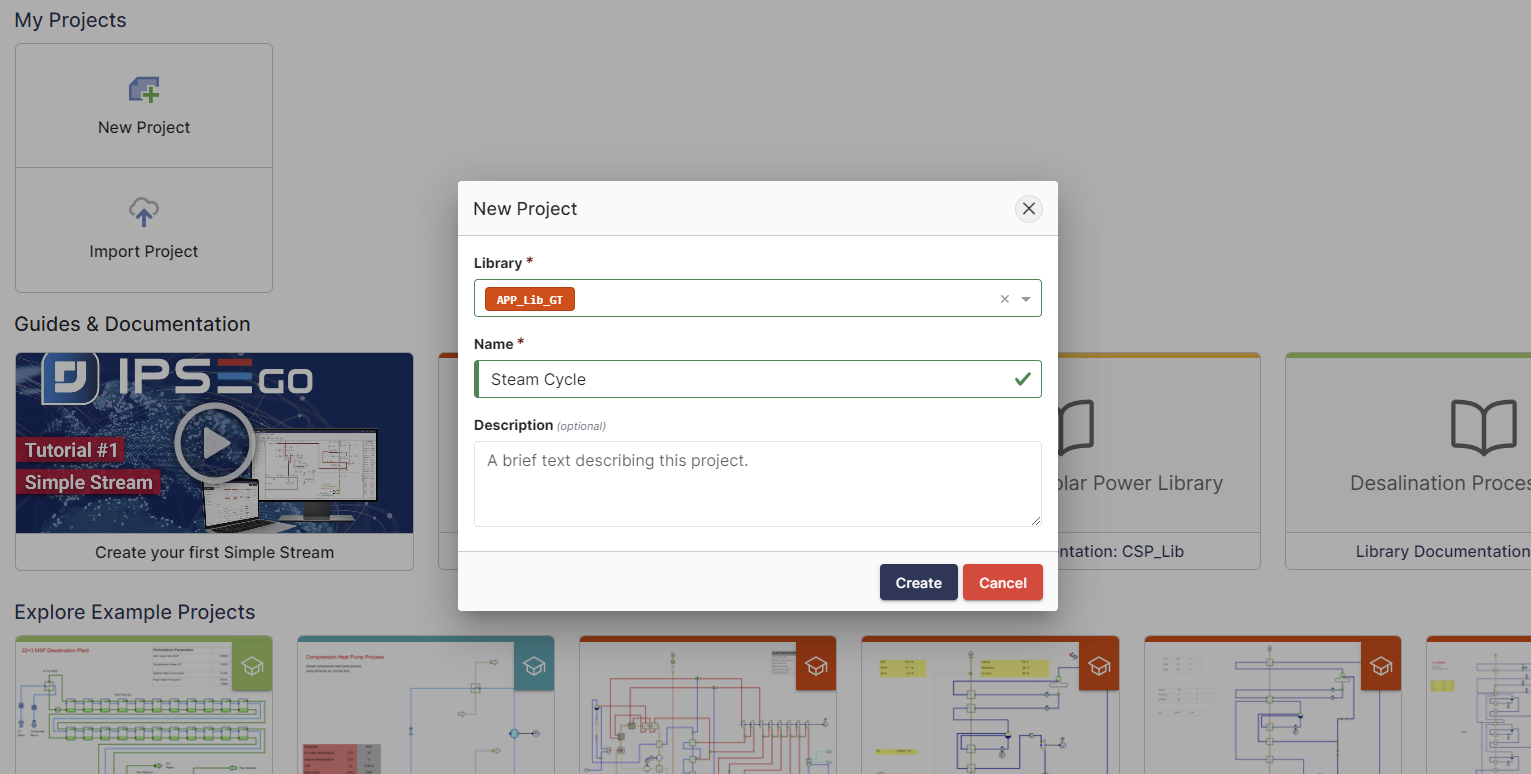
The first thing we need to do is to create a new project in IPSE GO. This can easily be done by clicking on “New Project” in the IPSE GO dashboard. You will see the following window and can now select the library and choose a project name:
2. Draw Steam Cycle
In our new project we will see our empty worksheet in the middle, the menu on the top, the icon menu on the left and the object manager on the right of the screen.
To draw the steam cycle, we can search for all of the needed components in the icon menu and simply add them to our project by clicking once on the icon in the icon palette, moving the cursor to the project window and clicking again once on the position where we want to place our icon.

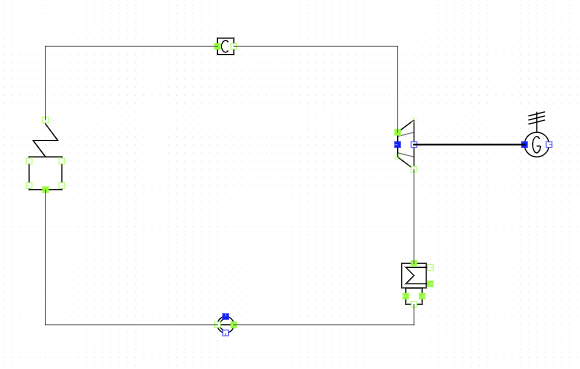
For our steam cycle we need a boiler, a connector, a turbine, a generator and a pump connected via streams. The complete cycle should look something like this:
3. Create the Composition
The next step is to create a composition for the steam cycle.
- In the menu on top, we go to the Objects tab and click on “New Global”.
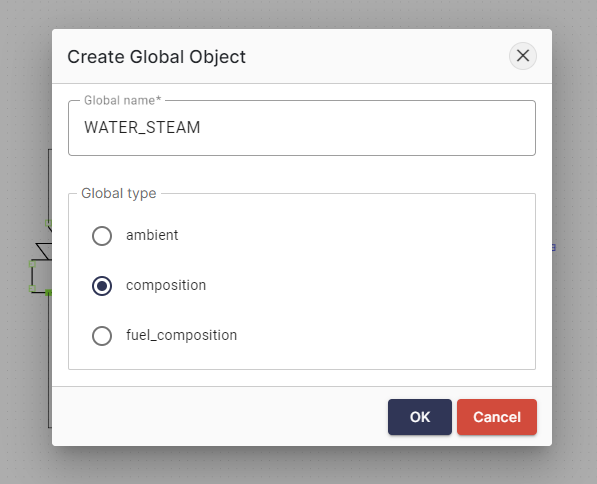
- We select "Composition" as the global object type and enter "WATER_STEAM" as the name.
- We click "OK" to create the new composition.
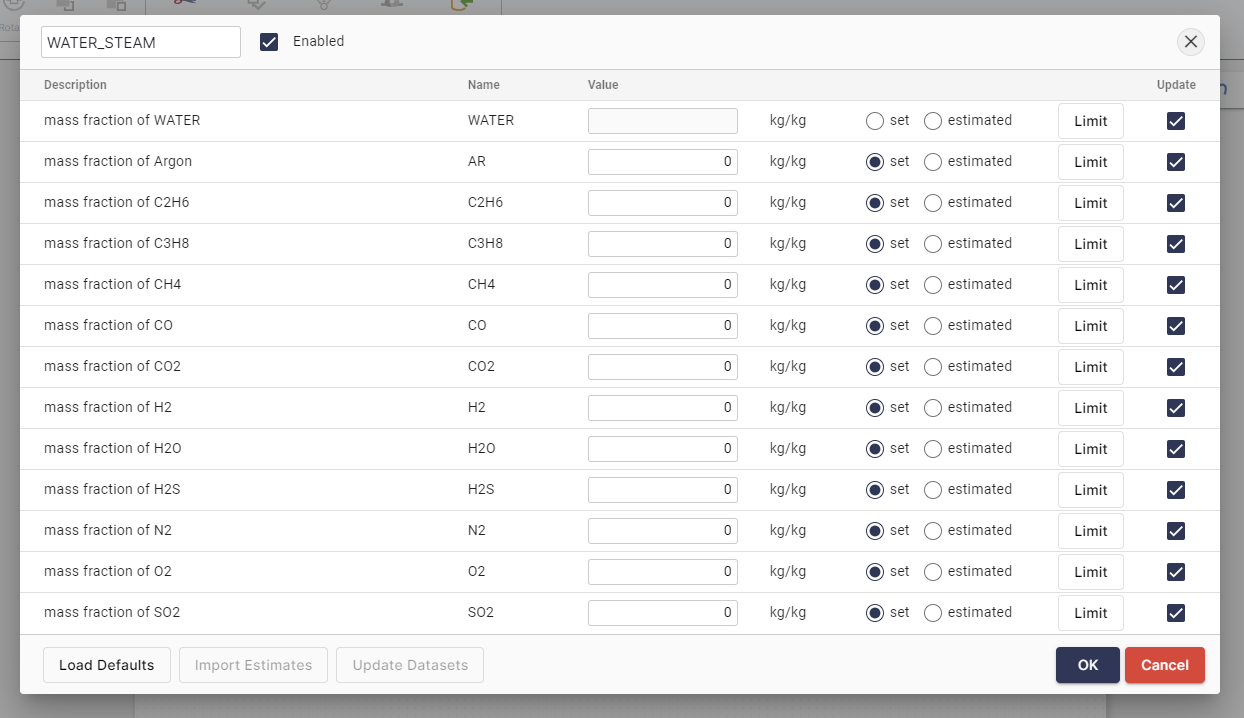
In the composition options we set all other chemical components besides “WATER” equal to 0. This means that our composition is pure water.
4. Add the Composition to the Streams
To set the composition “WATER_STEAM” for a group of selected streams:
- We select all streams for which we want to define the same composition.
- We select Objects › References. IPSE GO opens a window where we can now select the reference that we want to set and the composition that we want to reference.
- From the list of references we select “WATER_STEAM” and click “OK” to accept our choice.
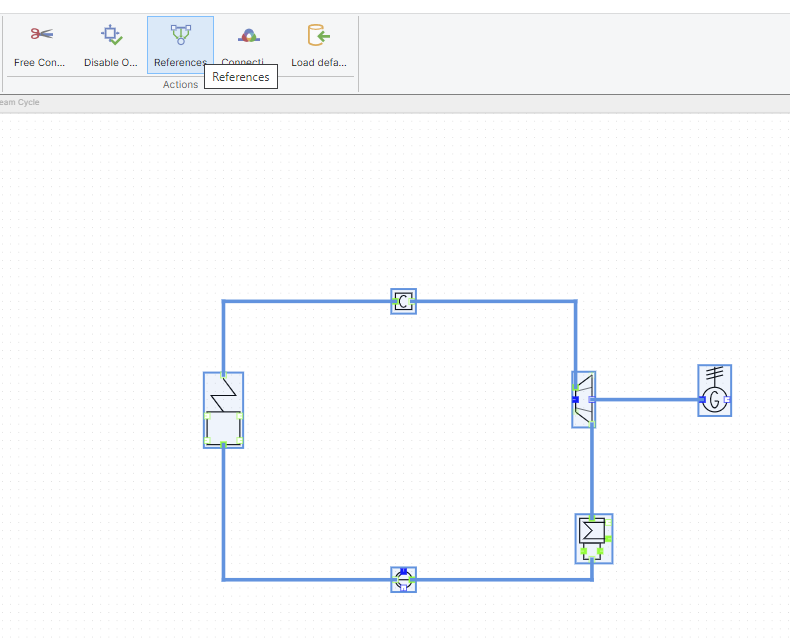
5. First Calculation
If we click on Calculation › Calculate, we will receive the following error message:
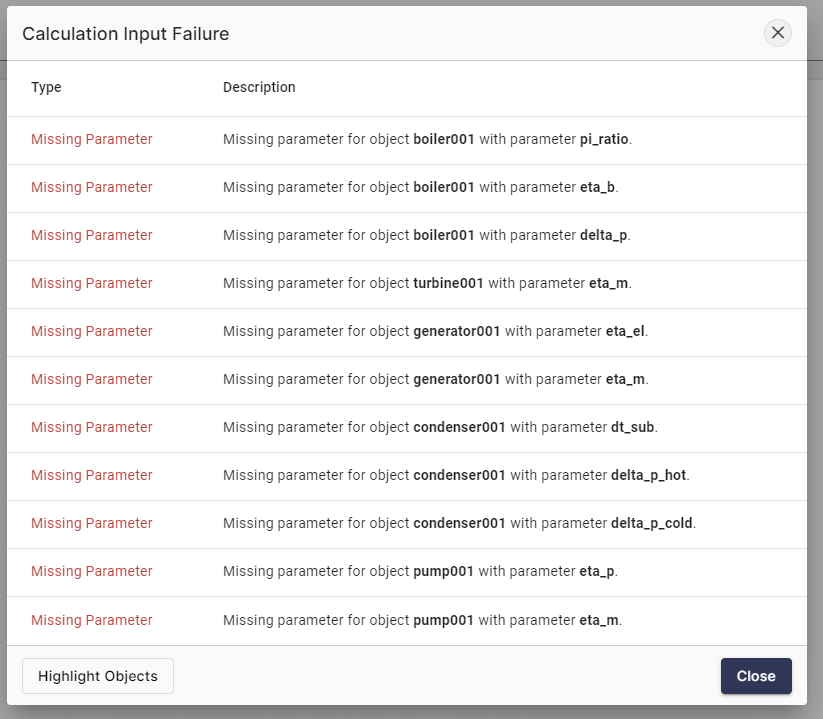
IPSE GO has detected that we did not provide data for every parameter. Parameters are numerical values that always must be defined. In the error message we can see which parameters have not been defined.
We click on “Close” to go back to the worksheet.
6. Fill in Parameters
We now have two options to provide the missing parameters:
- We either enter the parameters manually, by editing the unit data window.
- We use values from the default value database.
To load default values from the default value database:
- We select Objects › Load Default Values for all objects. IPSE GO opens a window where we can choose if we want to overwrite existing values.
- If we have an object selected, IPSE GO allows us to choose to load default values for only the selected object or all objects of the project.
- We click ”Yes” to load the default values

If we calculate now, we will receive the following error
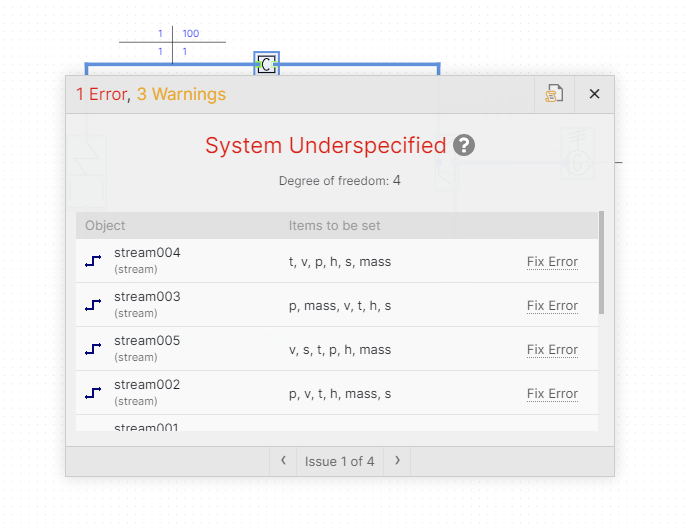
To solve the system successfully we have to set 5 additional variables. We have the flexibility to choose the variables that are most appropriate for our particular problem. The selection of these variables requires a certain level of experience.
7. Set final Variables
For this example, we choose the following variables:
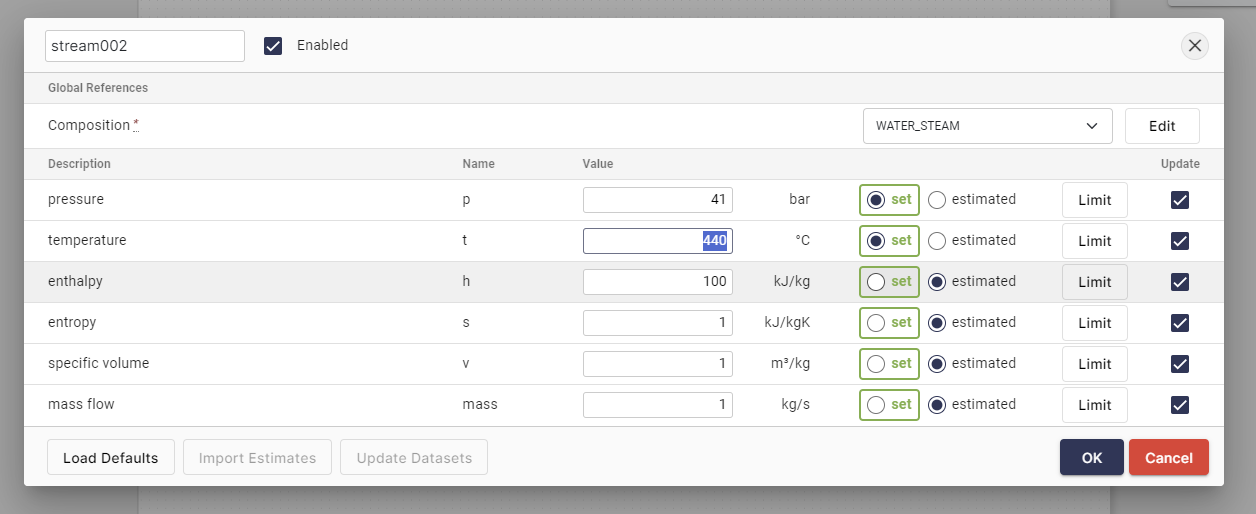

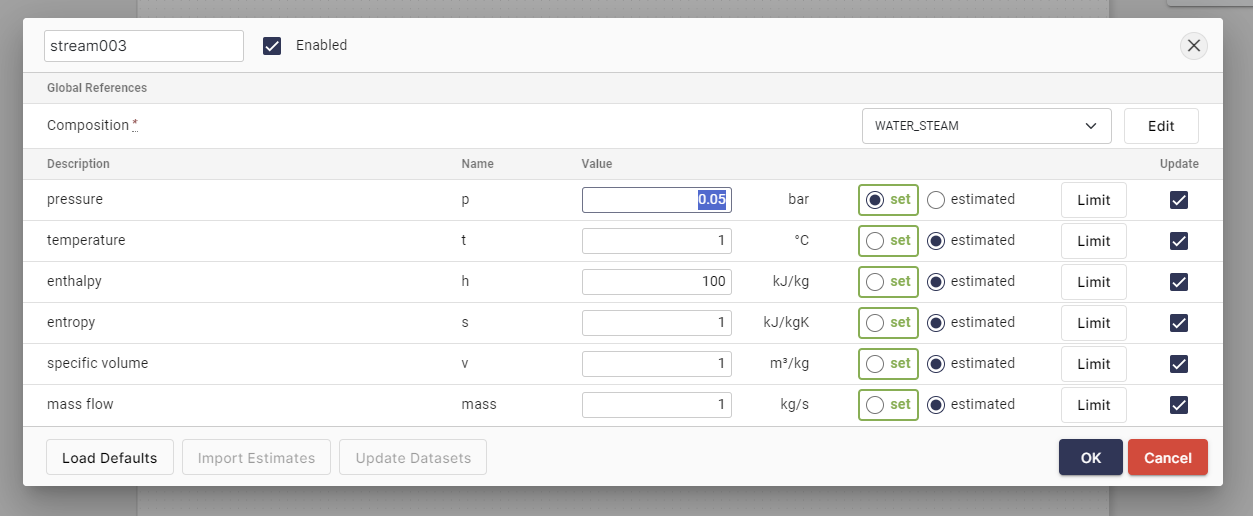
To change the variable, we double-click on the desired component.
Final Calculation
Now if we click on Calculation › Calculate, we will receive the message Calculation completed without any errors:
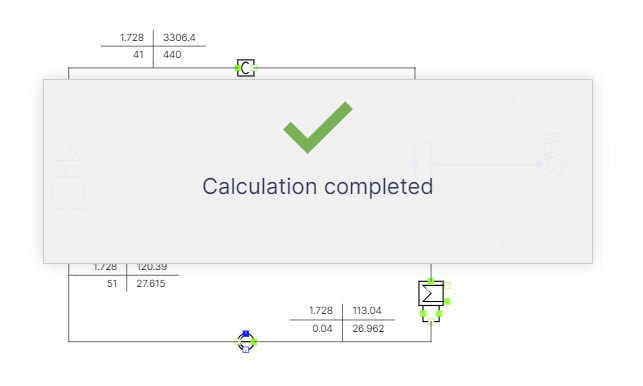

Congratulations! You've now completed an essential IPSE GO simulation tutorial. Stay tuned for more IPSE GO tutorials, and don't hesitate to ask questions or share your experiences.
If you want to test it out yourself, you can now request a free IPSE GO trial version here: Free Trial Request


1_thumbnail.png)